The Wavlink AC1200 Setup is an easy and useful way for people to improve and extend their current WiFi network without needing to know a lot about technology. This dual-band device can use both 2.4GHz and 5GHz frequencies, giving it a total speed of up to 1200Mbps. It is mostly used to get rid of weak signal areas, make the internet cover more ground, and make sure that activities like streaming, gaming, and browsing on multiple devices have a stable connection.
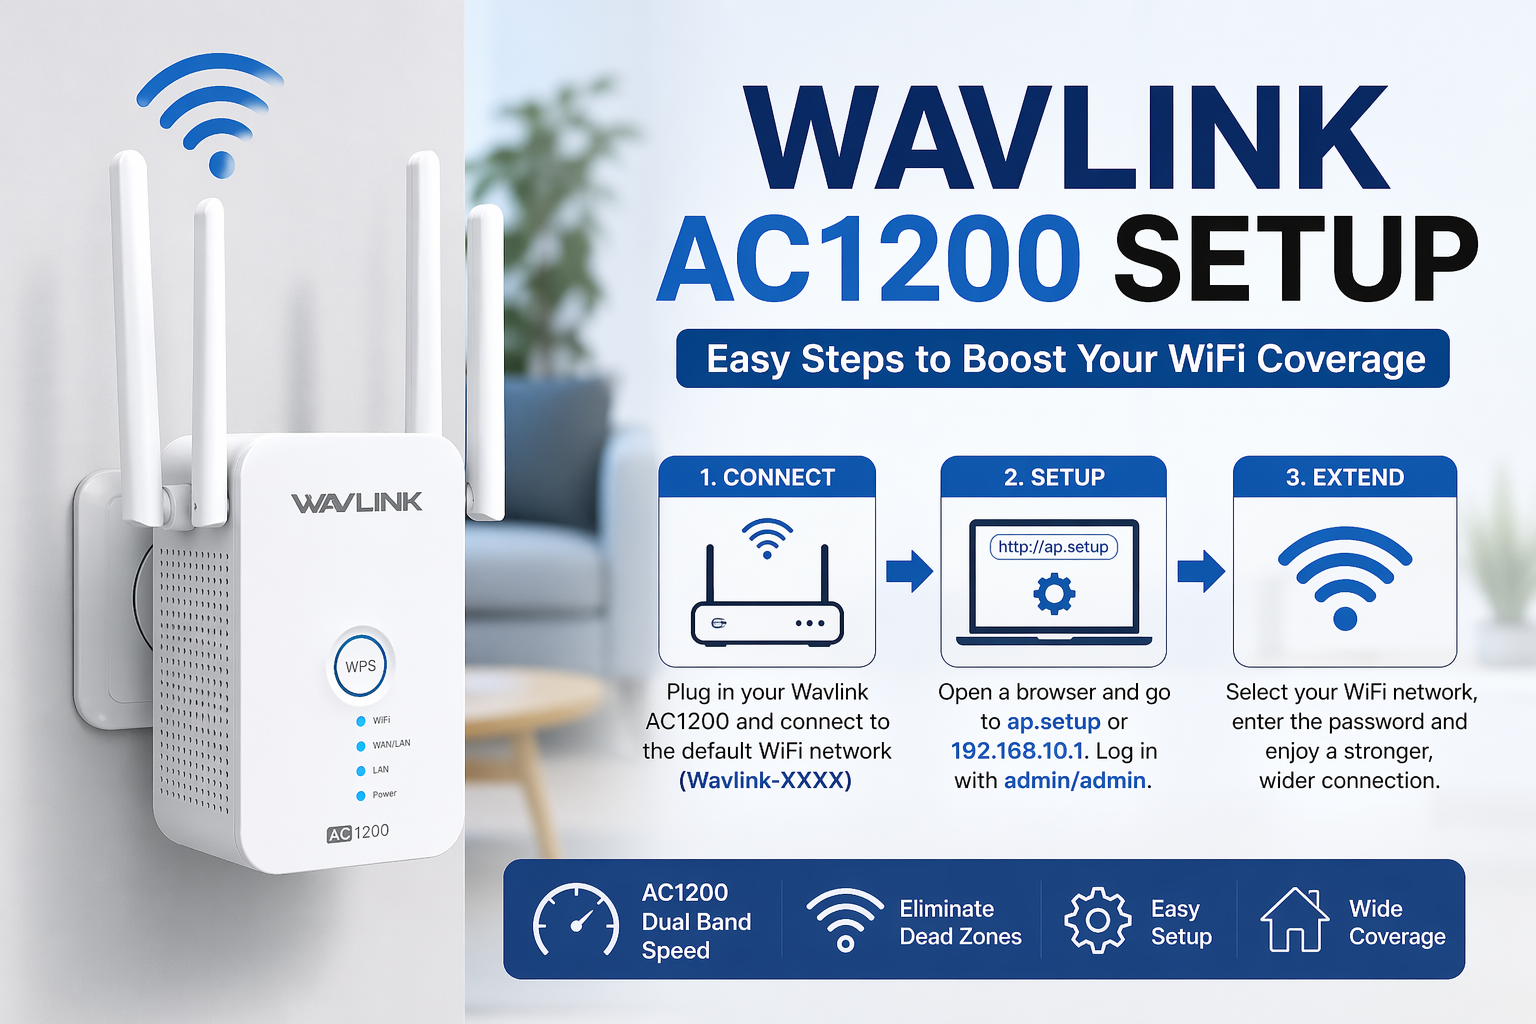
To set things up, you need to plug the Wavlink AC1200 into a power outlet close to your main router. Users can connect their smartphone or computer to the device’s default WiFi network once it is turned on.
Once connected, you can get to the setup page by typing in the default IP address or setup URL into a web browser. Users must log in with the default username and password on this page and choose the operating mode they want to use. Repeater mode is the most common mode for extending WiFi coverage.
When you set up the device, it will scan for available networks so that you can choose your home WiFi and enter the right password. The extender will automatically restart and apply the settings once they are confirmed. Pressing the WPS button on both the router and the extender is another quick way to set things up. This makes an automatic connection without having to do any manual setup.
You can also use the Access Point mode by connecting the device directly to the router with an Ethernet cable for better performance.
After setup, LED lights show users how the connection is going. A steady light usually means a strong signal, while blinking or red lights may mean that the connection is weak or that there was a problem with the setup. If you can’t get to the setup page or the signal is weak, resetting the device and setting it up again usually fixes the problem.
The Wavlink AC1200 Setup process is meant to be quick and easy for everyone. This way, anyone can improve their home or office internet coverage and have a better time online.