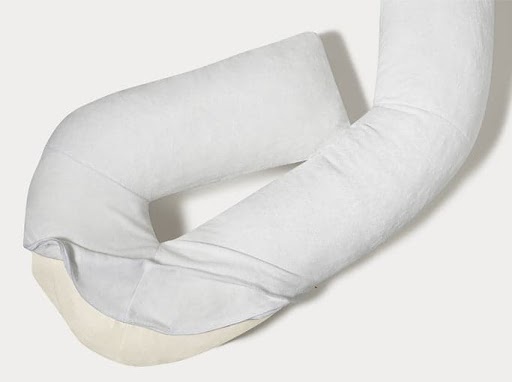
A lot of people who have used body pillows all say the same thing. They love the way it hugs their curves. But who’s going to take care of their surfaces? That’s right. You need covers for body pillows, too. You can’t just let them look dull and be dirty. Store‑bought options can be fine, but making your own lets you pick fabric, fit, and finish.
You can match the season, blend with your bedding, or try a fun print that makes you smile. Making a cover is also a smart way to learn simple sewing skills. Even beginners can do it with a few tools and a calm pace.
I have written this article so that below you will learn some of the tried and true ideas that balance comfort and style. Each one keeps washing and wearing in mind. Pick one, gather your supplies, and enjoy the quick win of a handmade finish for the cover of body pillows.
1. Classic Envelope With Hidden Zipper
Start with the envelope shape. The reason I put this in the very first is because it’s also the simplest one to pull off. A cover for body pillows that uses a long hidden zipper looks neat and stays put. This style gives you a smooth, tailored look without bulky buttons. It also makes laundry simple.
What you need
- Cotton percale or sateen, or a soft bamboo‑viscose or Tencel lyocell blend
- 22 to 30-inch invisible zipper, sized to your pillow length
- Matching thread, zipper foot, basic sewing tools
Steps
- Take a gander at how long and wide it is. Make sure to add an inch
- Slice it up into one front panel. And also make sure to have two back panels too. Each of them should overlap the other by around 6 to 8 inches.
- Install the invisible zipper along one back panel edge.
- Place the right sides together and sew around the cover.
- Clip corners, turn, and press. Top‑stitch for strength.
Tips
- Prewash and dry fabric to reduce shrinkage.
- Use a long zipper so the pillow slides in without strain.
2. Reversible Two‑Fabric Design
Want two looks in one project. Make a fully reversible cover with different but compatible fabrics. One side could be crisp cotton for warm nights. The other side could be cozy flannel for cooler weather.
Fabric pairings that work
- Cotton percale with light flannel
- Smooth sateen with breathable jersey knit
- Linen blend with soft microfiber
Steps
- Cut two full sets of panels, one for each fabric.
- Sew each set into a shell, leaving a gap for turning.
- Nest the shells right sides together and stitch around the edges.
- Turn through the gap, press, and close the gap with a ladder stitch.
Why it helps
- Easy mood switch when you want a fresh look.
- You can match one side to sheets and the other to a throw.
3. Stretch Jersey Slip‑On Cover
If you like a snug fit with no hardware, try a slip‑on made from cotton jersey knit. The slight stretch holds the pillow in place and feels like a soft T‑shirt.
What you need
- Medium‑weight jersey knit with good recovery
- Ballpoint needle to prevent snags
- 0.75-inch elastic for the open end
Steps
- Cut a tube that is the pillow length plus 2 inches and the pillow width times two, minus 1 inch for stretch.
- Sew the long seam with a zigzag stitch so the seam can flex.
- Hem one end. Create a casing on the other end and thread the elastic through.
- Slide the pillow in. The elastic end closes like a drawstring.
Good for
- Kids’ rooms and dorms where quick changes matter.
- Anyone who wants a smooth, hardware‑free cover.
4. Quilted and Piped Luxe Cover
For a plush look, add thin quilting and simple piping. The result feels cushioned and looks custom on the bed or in a reading nook.
What you need
- Top fabric, backing fabric, and thin cotton batting
- Piping cord and bias tape or ready‑made piping
- Walking foot for even stitches
Steps
- Make a fabric sandwich with batting in the middle. Baste.
- Quilt straight lines 1 to 2 inches apart. Keep the lines even.
- Stitch piping around the front panel edges.
- Join the front to a plain back with a zipper or envelope overlap.
Tips
- Mark quilting with a washable pen so lines stay straight.
- Press often. It keeps layers flat and sharp.
5. Easy Tie‑Closure or Snap Cover
If you prefer no zipper and a playful look, try ties or snaps. The closure becomes a design detail that is simple to sew and easy to use.
Design picks
- Wide twill tape ties spaced every 6 to 8 inches
- Plastic snaps installed with a hand press
- Fabric loops with small buttons for a classic touch
Steps
- Sew the cover like an envelope, but leave a straight opening.
- Space your ties or snaps along the opening edge and mark positions.
- Secure ties with box‑stitches or install snaps per the tool guide.
- Add a facing to hide the inside of the closure and boost strength.
Why it works
- No sharp parts against skin.
- Easy for kids to open and close.
Conclusion
A body pillow already brings calm. A well‑made cover turns that comfort into a daily joy. Choose a style that fits your time, tools, and taste. The classic envelope with a hidden zipper is clean and strong. A reversible design gives you two moods in one. Jersey knit makes quick changes simple.
Quilting and piping add a luxe touch. Ties or snaps keep things soft and friendly. Patchwork brings heart to your space. Each option is reachable for a beginner with patience and practice. Use colors and textures that lift your room. Keep care easy so you will use the cover often. With a little planning, your handmade cover will look good, feel good, and last.